Ever wanted to learn how to use grunge and splatter brushes effectively, we here we learn how to turn our face into a grungy portrait use various types of brushes and some more advanced techniques. Read on to learn how to achieve this effect in only a few simple steps and gain a better understanding of brushes in Photoshop with this tutorial.
Tutorial Files
If you are a PSD PRO member then download the PSD file and much more by going here.
Introduction
Grunge and splatter brushes are very common and are often seen in professional print design and even web design. However they are not always used effectively so I thought I’d try and teach some techniques while mimicking an effect used by designer, Jens Sjobergh . Before we start there are three types of brushes which you need; grunge, splatter and hair. Download two or three of each of these, it doesn’t matter which ones as they are all similar.
Step 1
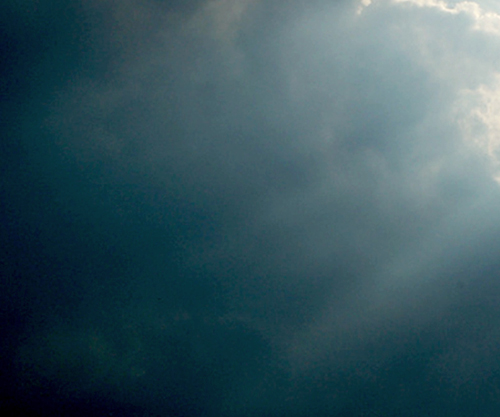
Create a new document with dimensions; 1200x1000px. First we will create the background, I wanted to go for a noisy cloudy background, which may make you think about using the clouds filter then the noise filter. Although the clouds filter is very useful, it shouldn’t be used as a main part in any image. If, by looking at the final result of an image, you can tell the clouds filter has been used then it has definately been used wrongly. So instead we will use a stock image of clouds which you can download here. Copy it into your document then don’t bother scaling it, just move it until it looks good.
Step 2
Create a new layer then select the brush tool and choose a large soft brush, now set the foreground color to any bright color. Next just paint some random strokes over te image and use a few different colors and try and end up with a result that looks like the one below.

Step 3
This coloring is a bit to harsh so to soften it a bit go Filter>Blur>Guassian Blur and use a value of 250px. Now change the blend mode of this layer to color.

Step 4
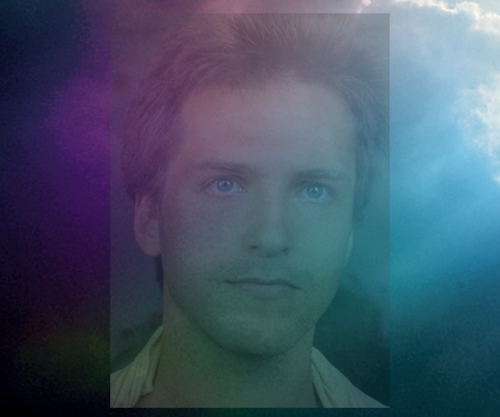
We now need an image of a face for reference, any face will work so try using your own, if not then use the one I used which was just a stock image and can be found here. Copy it into your document then scale and move it until it is positioned similar to mine. Now change the opacity of this layer to 25%.
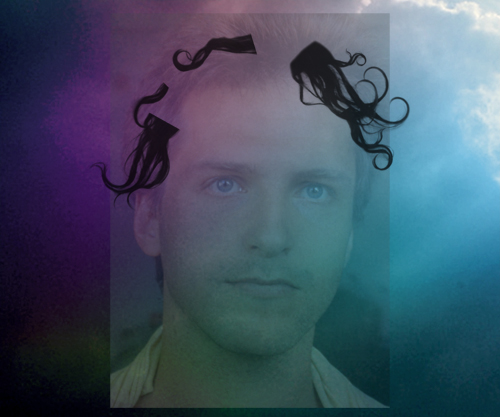
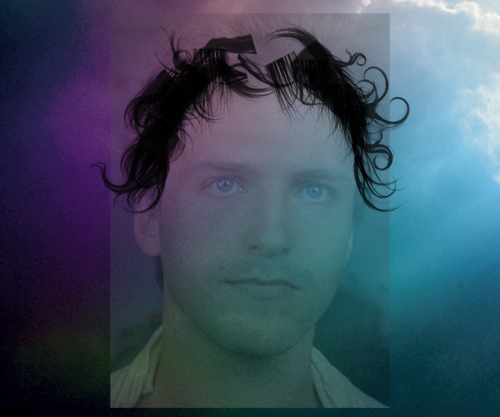
Step 5
We are going to work on the hair first so get some of your hair brushes open and change the foreground color to black. A good idea would be to create a new layer group then put all the hair layers within this. For each of the images below I used a seperate layer so remember to create on before you start brushing. You may need to rotate the brush at times, to do this hit F5 to bring up the brushes panel then under Brush Tip Shape, move the the arrow that looks like a compass. Try and follow the outline of the person’s hair but don’t worry about being too accurate. I gave him a goatee in the last layer but this isn’t needed especially if you are a girl. You’re really just wantng to build the hair up layer by layer.

Step 6
With the brush tool still selected, hit F5 then change the settings to match the ones below, this will be for the eyebrows so you may want to use a smaller brush if you want narrow eyebrows.

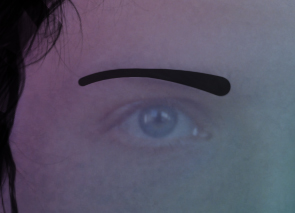
Step 7
Create a new layer then select the pen tool and in the main toolbar make sure the paths button is selected. Start by clicking at the thicker end of the eyebrow then at the other end click and drag to curve the path to match the eyebrow. Now select the brush tool (B) then hit Enter to stroke the path, the simulate pressure button doesn’t make a difference here. Do exactly the same for the other eyebrow in a new layer.
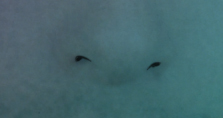
Step 8
We want a smaller brush for the nostrils so either change it via the brushes panel or just press the [ button a few times and in a new layer create a smal path going round the nostrils then stroke it in the same way as you did in the last step. You may need to do some extra adjustments manually after you have done this with both nostrils.
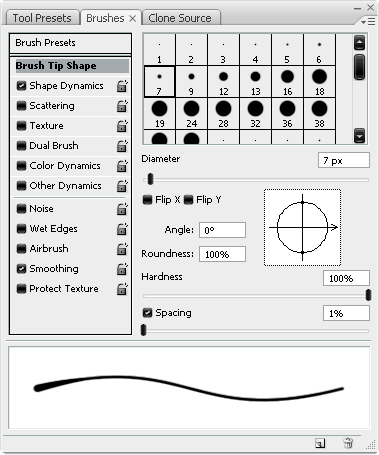
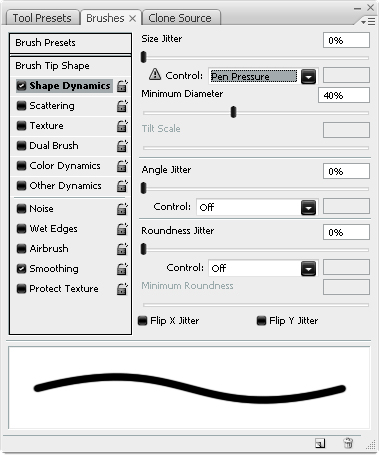
Step 9
Go back into the brushes panel and select a 2px round brush and change the shape dynamics to match the image below.
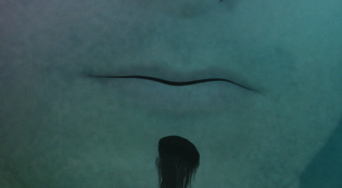
Step 10
Create a path following the lips then stroke this path in the same way, this time making sure simulate pressure is checked. If you are using a female you make may want to outline the top and bottom lips in the same way.
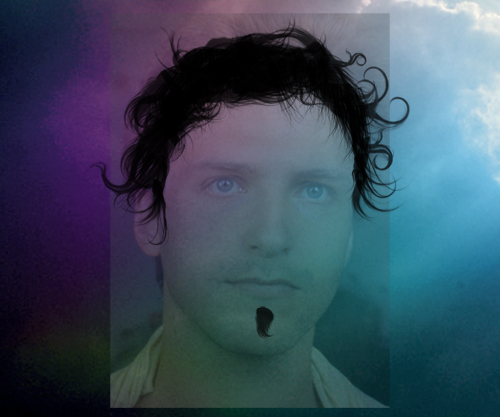
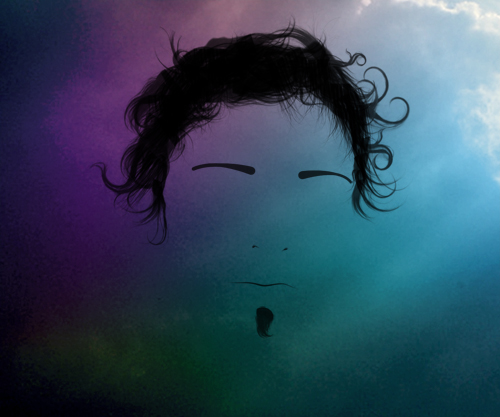
Step 11
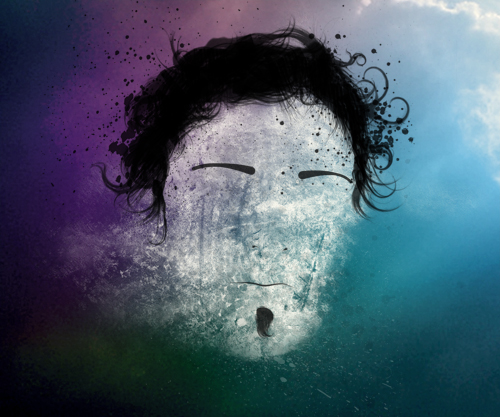
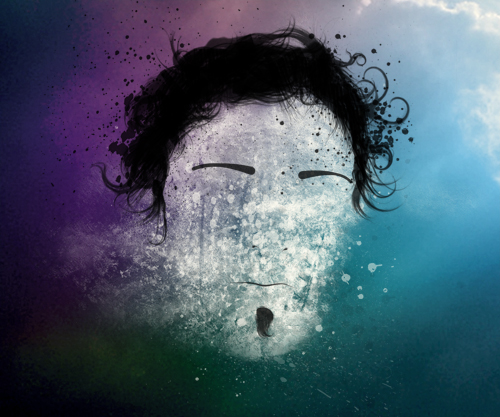
Below is what my image looked like at this point, feel free to add some more details like eyes and ears but I wasn’t aiming for a particularly realistic result. I touched up a few bits at this point and lowered the opacity of a few layers so that they were all a similar shade.
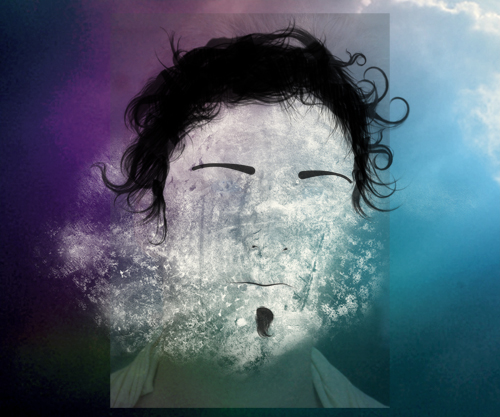
Step 12
Now it is time to use our grunge brushes so create a new layer below all the face and hair details but still above our reference image. Change the foreground color to #fffff1 then gover the face with different grunge brushes, you may want to adjust the opacity a bit.
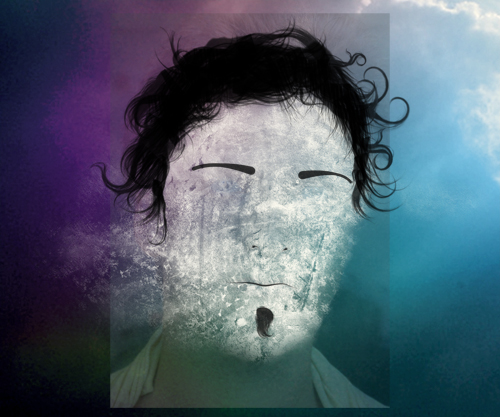
Step 13
Now we want to get rid of some of the grunge outwith the face, I thought it would look good to leave some at the left of the face. There is two ways to do this; erasor or layer masks, the latter of which is a much better choice. If you haven’t used layer masks before then check out this tutorial which will teach you some stuff about layer mask. If you still don’t feel confident then just use the erasor tool with a large soft low opacity brush. Work at it until it resembles the image below. Another optional thing that you can do here if you know how to do it is to add a displace filter to the grunge using the face as the map; this will make it follow the contours of the face more but is optional and won’t make a big deifference.
Step 14
Now hide your reference image then create a new layer and select black as the foreground color. Create a layer below the hair and face details but above thr grunge. Now select some splatter brushes and use them around the hair. Also use some at a very low opacity around the face.


Step 15
Now change the foreground color back to #fffff1 and in a new layer add some splatter brushes over the face and below the chin or anywhere you think it would look good.Now just adjust the opacity to suit and your done!