192 Comments

Create Smoke Text

May 7, 2009

A big thing that you see in graphic design at the moment is the use of smoke stphotography, these photos look really good but look a lot better when you mess about with them in Photoshop. Here we’ll be mixing type and a smoke image to create a really nice abstract wallpaper. This is just a quick tutorial but hopefully you’ll learn some new techniques so give it a go.

Introduction

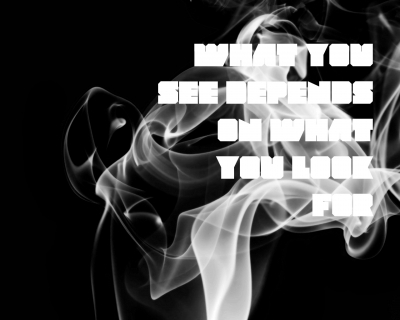
I got the idea for this tutorial from a font preview image here. Check out what we’ll be learning to make below.

Step 1

Create a new document with dimensions; 1280x1020px and a resolution of 72px/in. Create a new layer. Change the foreground color to black then go Edit>Fill and fill it with the foreground color, a quicker way to do this is to hit alt+backspace. Paste your image into the document, the one I used can be found here. Select the move tool then move this layer so you have it looking like the image below.

Step 2

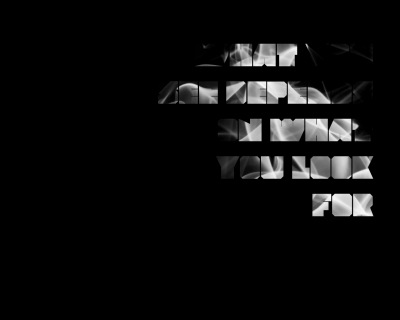
In the layer panel click the adjustment layers button and select black & white, now just change the red value to 150% and leave the rest. Now add another adjustment layer, this time the invert one. Now you should have something that resembles the image below, notice how the smoke looks a bit nicer.

Step 3

Select the two adjustment layers and the smoke layer by holding Ctrl and clicking on them in the layers panel. Now right click on one of the selected layers then select convert to smart object, or if that option isn’t there then just select merge layers. The advantage of using smart objects over just merging is that you could go back and edit the smoke here or the black & white values but I think only CS3 and up support smart objects. Select the text tool then change the font to a block style font, the one I used can be downloaded here, and a size of about 100pt. Now type your text, here I wrote a quick quote I remembered and used the color white. Move this layer so that your image resembles the one shown below.

Step 4

Hold Ctrl and click on the text layer to make a selection, then selct the smoke layer. Now add a layer mask to this layer by clicking the layer mask button in the layers panel. Hit Ctr+D to remove the selection then hide the text layer.

Step 5

Right click on the smoke layer in the layer panel and select duplicate layer, you can also just hit Ctrl+J to duplicate a layer, its a bit quicker. Select the layer mask on the new smoke layer and invert it by hitting Ctrl+I. You’ll notice you’re image looks like it did a few steps back but we’ll sort that out.

Step 6

Select the new smoke layer then make a layer group by clicking the wee folder icon in layers panel then drag the newer smoke layer onto the layer group to put it inside then change the blend mode of the layer group to screen in the layers panel. Now add a layer mask to this layer group by clicking the layer mask button in the layers panel. Select the brush tool then right click in the document to open the brush settings panel, you can access this from the main toolbar but this way is faster. Change the brush to a soft round brush with a diameter of about 240px but you may have to keep changing the diameter. Change the foreground color to black then select the layer mask you just made. Select the brush tool then put on some brush strokes over the text and you”l notice this will get rid of the smoke around the text, you do still want to keep some of the smoke flowing into the text so try experimenting by changing the opacity of the brush in the main toolbar. If you got rid of a bit too much smoke then just change the foreground color to white and brush then this will unhide the smoke. Keep at it until you have something similar to the image below.

Step 7

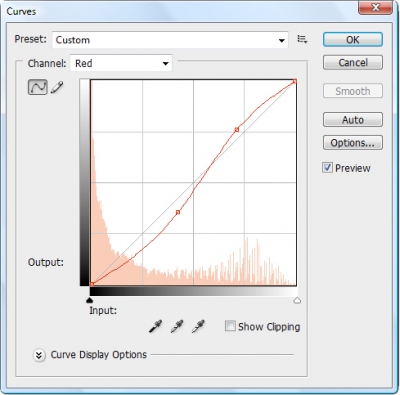
Now add a curves adjustment layer at the very top of the layer stack then change the channel in this box to red and click and drag on parts of the curve until you get something similar. Feel free to experiment with the other channels, I just used red as an example.

Step 8

You’ll notice that a few of the words might be impossible to read so if this is the case then you can lighten the background a bit. Remember that layer we created in the first step and filled black well select that and lower the opacity, this will lighten the background a bit, you shouldn’t need to lower it a lot, I think I put it to 98% but I quite liked it being almost unreadable.

Conclusion

Hopefully you’ve learned a few new techniques that you can apply to some projects. A good idea would be to go back and repeat this tutorial but use a totally different image, not a smoke one. Let me know how you get get on.


Colorful Sticker Printing at Psprint.com.


Similar Tutorials:

Save and Share this Post

We like people who share our posts! Del.Icio.Us - StumbleUpon - Float - Reddit


Or why not subscribe to the feed? RSS - Email

192 Responses:

  • May 9th, 2009

    BMW:

    Wow! I really like this effect. It looks amazing. I’m going to try and recreate it except in After Effects for a video of smoke and not just a still. You seriously have the best tutorials on the web.

  • May 13th, 2009

    david rowling:

    hi, i’m stuck on step 4. I’ve merged the layers but cant get into the merged layers to select the smoke. im totally confused. any help?

  • May 15th, 2009

    VSP:

    hi i too have the same problem as David. after merging the layers how can we select the smoke layer. need you help?

  • May 15th, 2009

    Ross:

    Dave and VSP,
    Sorry, maybe I was a bit unclear when I was talking about the layers, after you’ve merged the smoke layer with the adjustment layers then I just called this merged layer the smoke layer, so when I said select the smoke layer, what I meant was select the layer with the smoke in it as opposed to the text layer. So in step 4 you would select the new merged layer or smart object.

    Usually when I reference layers I do it by whats in the layer rather than telling you to rename each layer just so I can reference them in the tutorial. Still renaming layers is definitely the way to go but I’m sure you can do that on your own.

    Glad you like this one!

  • May 17th, 2009

    steph:

    I’m also having trouble with step 4. while selecting both the smoke layer and the text layer, I can’t click on the “add layer mask.” it doesn’t allow me that option.

  • May 29th, 2009

    Matt:

    Hi, i can’t select Black and White in adjustment layers, i dont know why, been trying to find a way round it, really want an effect like this and am new to photoshop so help please!!!!
    I can’t select exposure either, that and Black and White come up grey instead of black so cant select it.
    thanks in advance

  • June 9th, 2009

    Bailey:

    Hi. I’m stuck on step 4 too. I don’t understand what I’m supposed to select or how to do the layer mask. Contol D doesn’t do anything either.

  • July 3rd, 2009

    Fabian:

    I don’t understand step 4 either. Control D doesn’t do anything too… can you explain it better? because I do your steps piece by piece. May you can make a small video of step 4? or edit it.

  • July 11th, 2009

    david:

    exelente aporte hemano suige asi

  • July 24th, 2009

    KENAN:

    I also got mixed up in step 4 but I played around a little and managed to do it. Good tutorial overall!

  • August 8th, 2009

  • August 11th, 2009

    Ian:

    Haha, I too am stuck on step 4, I can’t seem to get the smoke effect on the lettering?!? Please someone help me!~!!!

  • August 11th, 2009

    M:

    Kenan how did you get the layer mask to work? Photoshop doesn’t allow me to do that when I select the smart object along with the text layer.

  • August 11th, 2009

    mdee:

    Anybody know how to select multiple layers and then apply a mask? My layer mask button becomes unclickable if i choose more than one layer.

  • September 3rd, 2009

    Spencalish:

    step four is confusing me man. its probably like the easiest step ever but for some reason i can’t get my head around it lol. is there any other way that you can explain how to get the smoke effect on the text? any help would be greatly appreciated cause this effect looks great.

  • December 18th, 2009

    Mort3ZA:

    very very Goooooood!
    continue these learnings
    thanks

  • January 2nd, 2010

    hojjjat:

    Hi
    very good.

  • January 7th, 2010

    Lonn:

    I also had some trouble with step four, but I think I figured it out. When you hold ctrl to click on the layer, make sure you are clicking on the rectangle with the T in it, not the layer name. If you click the layer name, nothing will happen. When you click the rectangle with the T in it, you get a selection of the text and that is what creates the mask for the smoke layer.

    Hope that helps someone else who finds that a little confusing.

  • August 16th, 2010

    Maz:

    Hai, not that im pro or anything. but you do not select the text layer with merged (smoke) layer.
    He simply means you marque it by CTRL clicking the thumbnail. then JUST select the smartobject (smoke layer) and there on u can add a mask. feel free to play around with mask settings, i found some really neat stuff. reps for the tutorial!

  • August 30th, 2010

    flyer templates:

    I love that font. And it’s a great choice for this tutorial. Thanks for sharing.

  • September 6th, 2010

    Someone:

    This didnt work for me at all. Once I got to step 4 I got stuck. I could not add a layer mask to either the smoke or text layer. No matter how much I tried or played around with things nothing worked. Command, control, alt command and shift …. nothing worked. I also read all the comments and tried to apply what other people were saying but still not one thing worked…. step 4 was redundant. I wasted over an hour.

  • September 9th, 2010

    wholesale designer clothes:

    Good post. You did a good work,and offer more effective imformation for us! Thank you.

  • September 17th, 2010

    Matt:

    The text you’ve made looks great and it’s clearly well thought out so thank you, however like so many others I also get stuck at step 4. I thought Maz’s comment had unlocked this step but unfortunately it only took me a little further.

    Ross, could you please help us all by talking us through stage 4 and how you managed to end up with the beautiful smoking text it shows us.

    I’d love to be able to duplicate this and experiment with a few different ideas using this technique but right now I’m still stuck

    Thank you!

  • October 17th, 2010

    George:

    I surprisingly managed to get to step 6 but i don’t get what you mean with “changing the blend mode to screen”.

    As for the people who are stuck on step 4 just read MAZ’s comment and Ross’s and you should understand

  • October 17th, 2010

    George:

    Got it never mind. there’s a drop slide thingy bob that says screen in the layer editing thingy bob.
    BTW BRILLIANT TUTORIAL

  • December 5th, 2010

    Keda:

    nice tuts broth….

    really² wonderfull result :D
    nice…

  • December 14th, 2010

    tom watts:

    Amazing tutorial, except where do i download the smoke effect?
    carry on the good work :)

  • January 1st, 2011

    dam:

    visit for basic step by step photoshop tutorials for free
    http://pstutorials.byethost9.com

  • January 4th, 2011

    PeterJonson:

    all these suk, you suk. You suk at making art. You should probably stop. your also a terd burgerlar.

  • January 10th, 2011

    medical insurance policies:

    Me personally plus a buddy had been furthermore referring to Create Smoke Text | Learning Resources for Adobe Photoshop the other day together exactly the same viewpoint when you, one of several websites we all appreciated had been this blog.

  • January 14th, 2011

    Carl Hahn:

    A very interesting information on using Photoshop.

  • January 20th, 2011

    forex:

    Hello I enjoyed yoiur article. I think you have some good ideas and everytime i learn something new i dont think it will ever stop always new info , Thanks for all of your hard work!.

  • February 8th, 2011

    sam:

    visit for step by step Photoshop tutorials for free
    pstutorials.byethost9.com

  • February 17th, 2011

    Shazzad Hoshien:

    Awesome!!! smoke effect. Thanks for sharing…. :)
    Best
    Regards
    image masking service

  • February 19th, 2011

    Inkfreakz - Tattoo design:

    wow. amazing. i really like this effect

  • April 5th, 2011

    Graphics and Web Design Firm:

    Nice design good to see. I love these one. Thanks for sharing

  • April 13th, 2011

    Julia C.:

    Our photoshop cant recognize the images i want to paste..why is that so?

  • April 15th, 2011

    Srinivas:

    Wow! I really like this effect. It looks amazing. I’m going to try and recreate it except in After Effects for a video of smoke and not just a still. You seriously have the best tutorials on the web.

  • April 21st, 2011

    Matias:

    Hey , i’m having a little bit of trouble in step 4.
    I’m still new to photshop. i have cs5 version and instead of using the smoke image I used a smoke brush that I had downloaded. Now i have the text layer and the smoke layer and I dont know how to use the layer mask, when i use it it just shows two options ‘hide all’ and ‘reveal all’ . what should i do? sorry for the trouble.
    Greetings from Portugal

  • May 7th, 2011

    lg 3d tv review:

    Assets just like the one you talked about right here can be very helpful to me! I will submit a link to this page on my blog. I am certain my visitors will discover that very useful.

  • May 10th, 2011

    Yeast Infection for you:

    Yeast infection for you! it the best thing that can happen to you

  • May 11th, 2011

    melbourne photography:

    this is really impressive tutorial on creating smoke text..really amazing..

  • June 17th, 2011

    Photoshop Tutorials:

    great thanks for sharing

  • July 19th, 2011

    321bingosites:

    My programmer is trying to persuade me to move to .net from PHP. I have always disliked the idea because of the costs. But he’s tryiong none the less. I’ve been using WordPress on a variety of websites for about a year and am concerned about switching to another platform. I have heard very good things about blogengine.net. Is there a way I can transfer all my wordpress posts into it? Any help would be really appreciated!

  • July 22nd, 2011

    readsomefinancearticles:

    I’m not that much of a online reader to be honest but your blogs really nice, keep it up! I’ll go ahead and bookmark your site to come back later on. All the best

  • August 19th, 2011

    plant information:

    WOW! This is really impressive tutorial on creating smoke text, Really amazing..
    Thanks for sharing..

  • August 21st, 2011

    dota 2 pictures:

    Do you mind if I quote a few of your articles as long as I provide credit and sources back to your site? My blog is in the exact same area of interest as yours and my visitors would definitely benefit from some of the information you present here. Please let me know if this ok with you. Thank you!

  • August 24th, 2011

    Longchamp outlet:

    Interesting article. Well done and good luck with your very great work.
    I wish you have a luxury time to consider using benefits articles can offer. Thanks for sharing.

    You have a cool web site. It is almost the first time I encounter something like that.
    In fact I’m thinking of creating my own one.Google’s results pages are simple,
    and that’s why they work. Simple.So thanks for it.

  • August 24th, 2011

    tory burch outlet locations:

    I am about to begin a blog and this will help me tremendously.
    Of course it has given me many things to consider as I update my website too. I appreciate it much.

  • August 24th, 2011

    gucci sale:

    I have read a few of the articles on your website now, and I really like your style of blogging

    It is interesting to read your post. I would like to thank you for updating the subject here. Thanks for this one I can know how to install and work with Flash and Umbraco package.

    It is interesting to read your post. I would like to thank you for updating the subject here.

  • August 24th, 2011

    juicy outlet:

    It is interesting to read your post. I would like to thank you for updating the subject here.

    I think youve made some truly interesting points. Not too many people would actually think about this the way you just did. Im really impressed that theres so much about this subject thats been uncovered and you did it so well, with so much class. Good one you, man! Really great stuff here.

    I am about to begin a blog and this will help me tremendously.

  • August 26th, 2011

    Lelia Stigler:

    Really enjoyed this post, is there any way I can receive an email sent to me when there is a new update?

  • September 4th, 2011

    short white wedding dresses:

    I am glad you have posted information on this topic.I hope you will keep this blog up to date with more information

  • September 4th, 2011

    knock off coach purses:

    Big Thanks for the article RSS feed added

  • September 5th, 2011

    tory burch outlet store:

    I am about to begin a blog and this will help me tremendously.
    Of course it has given me many things to consider as I update my website too. I appreciate it much.

  • September 5th, 2011

    Denver Carpenter:

    Excellent post. I was checking constantly this blog and I’m inspired! Very useful information particularly the last section :) I maintain such information much. I used to be looking for this certain information for a long time. Thanks and best of luck.

  • September 8th, 2011

    juicy couture handbags outlet online:

    Have the petals pulled out and have them scattered on the center of the table

  • September 14th, 2011

    windows phone blog:

    Thanks for one’s marvelous posting! I truly enjoyed reading it, you will be a great author.I will make sure to bookmark your blog and definitely will come back in the foreseeable future. I want to encourage you to definitely continue your great work, have a nice weekend!

  • September 14th, 2011

    Russel Crull:

    As I website possessor I believe the subject material here is real excellent, thanks for your efforts.

  • September 19th, 2011

    Vibram Five Fingers:

    This is a great blog,I like this post it is very good and informative. I am sure that this post will be very much helpful for people.

  • September 22nd, 2011

    headphones:

    this article is good, i like it. support.

    ykchunfan010

  • October 2nd, 2011

    longchamp le pliage:

    This looks absolutely perfect, Really its remarkable. You have some great content but are getting lots of none relevant comments here too. I really like in a site, very informative, no waste of time on reading.

  • October 9th, 2011

    http://www.tnfoutlet.net:

    It was not clear http://www.tnfoutlet.net who carried out the killing. Some in the opposition said the regime was responsible for his assassination.

  • October 20th, 2011

    cheap soccer jerseys:

    I’m not so sure, but I’m willing to reconsider because you are making quite a few fabulous points.

    Hi, this a brilliant information man. im interested in this item.

  • October 20th, 2011

    cheap juicy couture handbags:

    this is one amazing article! Thank you for posting this.

    Thanks for your personal marvelous posting! I actually enjoyed reading it

  • October 20th, 2011

    tory burch outlet online:

    great information you write it very clean. I’m very lucky to get this details from you.

    Usually I do not post on blogs, but I would like to say that this article really forced me to do so! Thanks, really nice article.

  • October 22nd, 2011

    Vanessa:

    I’ve followed the tutorial and I love the outcome! :) This is an amazing effect! I love experimenting on it. Great work!

  • October 26th, 2011

    pas cher ugg:

    J’adore cette jupe. Malheureusement elle n’est toujours pas disponible en Suisse (il en va de même pour la robe liberty, l’étole, la ceinture et la robe trois trous en noir). Saurais-tu si elles vont être disponibles ou si on va nous en priver? Ce serait tellement dommage. Je me réjouis déjà de pouvoir essayer les articles disponibles, que je vais recevoir prochainement. Merci pour cette belle collection.

  • November 4th, 2011

    tory burch:

    Of course it has given me many things to consider as I update my website too. I
    That Post is Full of informative. Thanks for that kind of sharing. Hope u will again share with us.

  • November 4th, 2011

    longchamp:

    Every time I visit this page there’s a new challenge and improved should study on.

    Thank you for spending some time to talk about this, I’m strongly about it and love learning read more about this topic.

    I like this concept.

  • November 7th, 2011

    mukluks boots for women:

    The Australia Luxe Angel Distressed Boots, furry boot style is one that’s commonplace in manitobah mukluks suede mukluk boots many stores around the world from brands like UGG and EMU Luxe Bedouin Short Boots . They’re very popular but have no place in the world up firming Manitobah boots and truly comfortable footwear. So when you’re too busy to work Manitobah Mukluks Winter Boots out but don’t want to sacrifice your furry boot style, you can get Manitobah Mukluks Snow Boots the Luxe Bedouin Boots Tall Grey and enjoy a bun and leg firming experience without setting foot in the gym.

  • November 7th, 2011

    tods shoes outlet:

    Many of the Tods shoes sale this season are to die for Tods Sneakers Men and you sure would want to get your hands on them and Tods Baulet D Bag Light Blue be one of the few who can walk up and down the busy streets Tods Moccasin Gommino Tassel with one around your arm. Some of the Tods Ankle Boots Men are already Tods Cap-Toe Flats 30% off and maybe even lower so you can update your closet with Tods Womens Moccasin Shoes some of the pieces that you failed to get last season.

  • November 8th, 2011

    moncler online:

    The cheap moncler online are founded of shiny consuming water repellent polyamide material and quilted with 100% goose reducing filling course A, moncler vests that could make this product instead mild and warm, Today, even moncler jacket is owning an escalating need many thanks toward styles and colors. Jackets usually can be found in inventory colours like white, black, however the cheap winter coats for women girls have brilliant colours and pleasant as pink, red, green, colours which you can imagine.

  • November 9th, 2011

    dts:

    Four months after trading for the mercurial defensive tackle, the New England Patriots cut Haynesworth on Tuesday after eight games in which he was largely ineffective on the league’s last-ranked defense. The Boston Herald first reported the news.

  • November 10th, 2011

    Abercrombie & Fitch:

    Abercrombie & Fitch uses packaging materials for their high Abercrombie & Fitch Tops quality production and safety, the logo should be fully A&F Women Hoodies printed. Those who know the style, covet fashion collections A&F Men Long sleeve the project company, as they are ideal for those who want to A&F Men Tee Shirts see in fashion. You can buy a shirt, abakuro and other clothes A&F Women Outerwear Coats when you go online and shop in the comfort of your own computer A&F Men Hoodies .

  • November 11th, 2011

    Zetta Zall:

    Hi, I can’t understand how to add your site in my rss reader. Can you Help me, please.

  • November 16th, 2011

    louis vuitton:

    When i incredibly in this way web page, containing more information, propane!!

  • November 18th, 2011

    longchamp:

    I have to say that Im really unimpressed with this. I mean, sure, youve got some very interesting points. But this blog is just really lacking in something. Maybe its content, maybe its just the design. I dont know. But its almost like you wrote this because everybodys doing it. No passion at all.

    Brilliant stuff, man! What you have to say is really important and Im glad you took the time to share it. What you said really spoke to me and I hope that I can learn more about this. Thanks for sharing your opinion. I am yet to find anything as enlightening as this on the web.

    You have some honest ideas here.

    Thanks for posting this. i really had good time reading this.

    Thanks for writing this. I really feel as though I know so much more about this than I did before. Your

  • November 18th, 2011

    ECCO:

    Here is some strong info in respect to.
    bookmarks and rediscovered, a long time make a note of. Well just use this one, much appreciated. I need something like this one of my school projects, lucky it has a similar topic as the one here. I am relieved that I found it, happy trails.
    This specific comment reminds myself in which at this point could some sort of great possiblity to further one’s college education and learning. MY SPOUSE AND I ask yourself if POST may well consider instruction online. Right now there exist a multitude of grant options now which were as soon as thus pretty imprecise to find a very few in years past.

  • November 19th, 2011

    Alvasin:

    You have a cool web site. It is almost the first time I encounter something like that.
    In fact I’m thinking of creating my own one. dentist in austin

  • November 20th, 2011

    JWalkCreations:

    1. Finish all of the steps then when you are finish

    2. Lower the opacity of the smoke layer to 49% then

    3. Duplicate the layer with the smoke and put in above the text layer and change the opacity to 100% then

    4. After you do that duplicate the text layer make sure its on top of the other text then

    5. Click the smoke layer on top and create clipping mask!

    6. And then it should be similar to what he has!

    HOPE THIS HELPS YOU BECAUSE IT HELPED ME!

  • November 23rd, 2011

    Syble Warncke:

    You’ve some seriously useful information published here. Excellent job and keep posting superb stuff.

  • November 25th, 2011

    Helga Rufer:

    Fantastic blog you’ve got here. You’ll find me looking at your stuff often. Bookmarked!

  • November 29th, 2011

    Australian Luxe:

    The Moncler jackets come in different designs and features. The jackets come with hoods as well which reflect a casual wear line. In addition, the simple line of the Moncler jackets is also available that is suitable for a casual day.

  • December 1st, 2011

    beemerbenzorbob:

    EASY SOLUTION FOR STEP 4.
    ok,
    So I just looked at this tutorial today and got stuck like others too on step 4.
    The easiest way I figured it out was
    1. have the text layer in front, with the magic wand tool (w) select all the text.
    2. once its all selected go back to the smoke layer create a layer mask, within that layer mask erase all that is outside of the letters and you got it!

  • December 11th, 2011

    Photoshop Cs4 Training:

    This is a great effect I will defiantly try this as it’s an effect i have been trying to recreate for some time now thankyou

  • December 13th, 2011

    LiJack:

    Nice hosting! It’s my first time to read like this article. tgawtg

  • December 30th, 2011

    Adobe Clipping Path:

    Awesome collections and encouraging tutorials. Hope will get your help when I start to try like this.

  • January 5th, 2012

    arif:

    very smokey, nice i like it.

  • January 13th, 2012

    Corporate Fashion:

    Mind Blowing .But i cant do it so easy,i am stuck at 3 no step.I am really helpful from this post.Thanks to author.

  • February 9th, 2012

    Clipping path BD:

    Thanks for your tips. These are helpful for us although we are often doing such type of creative works for our prestigious customers.

  • March 26th, 2012

    Infinitycp:

    Yea all time this help it any one but if you can more easy any share more basic comments and tutorials we will more appreciate and make to build our career

    Thanks a lot
    http://www.infinityclippingpath.com/.

  • May 16th, 2012

    photoshop clipping service:

    It’s a good tutorial but i am getting trouble with the image source you give. there need to request and i already requested for the image but there is no reply.Can you please give me another source ?? I need it greatly.

Leave a Comment

©PSDlearning 2012. The site is brilliantly hosted by Mediatemple.