
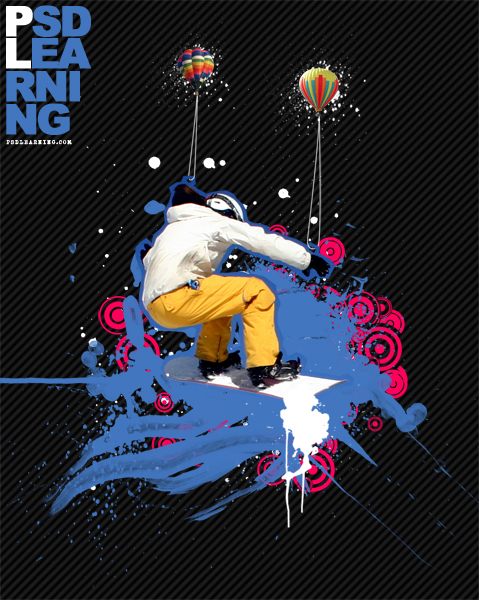
It’s fair enough learning some good Photoshop skills but putting them into practice to create good designs is what is important. Through this tutorial I’ll be teaching you how to create this cool looking poster design using some real simple techniques. We’ll be learning how to use different types of brushes effectively and also stock images.
Tutorial Files
If you are a PSD PRO member then download the PSD file and much more by going here.
Introduction
There’s a few things we need before we start, firstly you’ll two different kinds of brushes; you’ll need splatter brushes, loads can be found here, you’ll also need some circles/ring brushes like these ones so download and install them. Secondly you need a nice but simple pattern, I’ve used one of 45° lines, you may have a pattern like this but if not then I’ve written another tutorial which includes how to make a pattern like this so check it out here and just follow step 1. Enough said lets get started!
Step 1
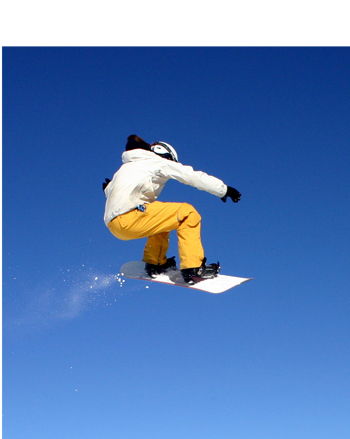
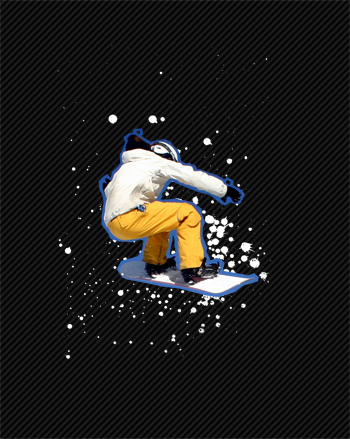
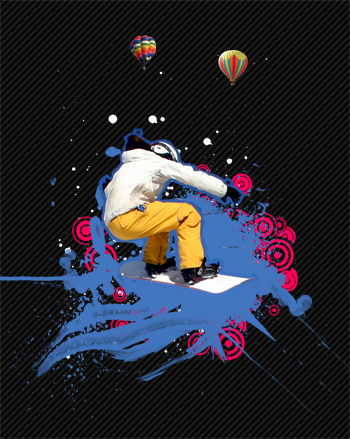
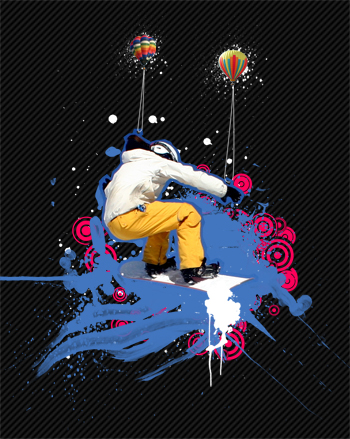
Firstly we need to get our snowboarder so go here and copy the image then create a new document in Photoshop, it should automatically size to this image. Now paste the image in then move it down slightly so you have something like in the image shown below.
Step 2
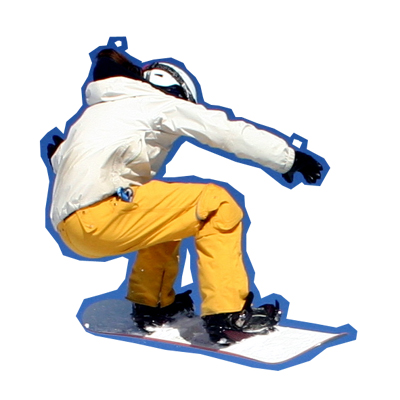
Next select the layer with the snowboarder on it then click the layer mask button to add a mask, if your not familiar with masks then basically if you paint black onto a mask then it will hide that part of the layer and the opposite goes for white, at the moment the whole mask is white so everything in the layer is visible. Select the polygonal lasso tool, now we want to give a kind of ‘cut out of a magazine’ look so very roughly just make a selection around the outline of the person then go Select>Inverse then select the mask and fill the selection with black; you can do this by going Edit>Fill. There was a few other parts that I wanted hidden like the part between his legs so you can do this in a similar way by just making a selection with the polygonal lasso tool then just filling the selection black, make sure you’re working on the mask not the layer. The two holes above his arm and hood I made in the same way and we’ll use them later on but if you’re struggling to get anything more than the outline then just go to the next step because these are just small details.
Step 3
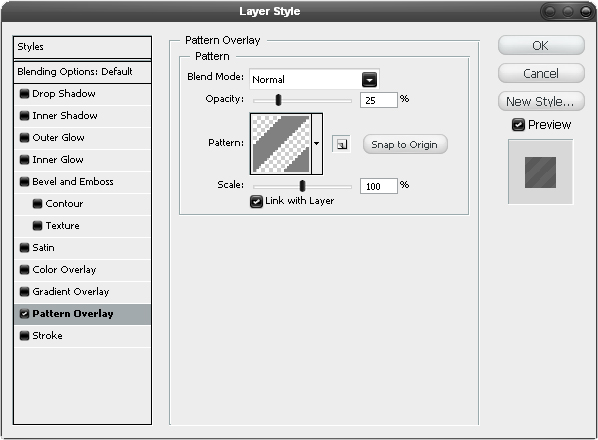
Until I say so all the layers created from now on go below the snowboarder layer, so create a new layer and fill it black then right click on the layer and go to blending options and add a pattern overlay using the 45° lines pattern I mentioned in the introduction. Use the settings shown below.
Step 4
Create a new layer and change the foreground color to white then grab a splatter brush and add some splatters behind the guy, try and get it looking similar to the image below.
Step 5
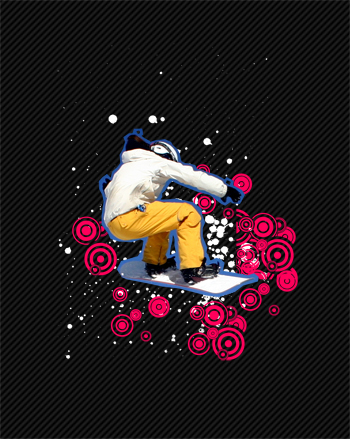
Now create some circles using pink as the foreground color, you can either make these yourself or just use some vector brushes as I mentioned earlier.
Step 6
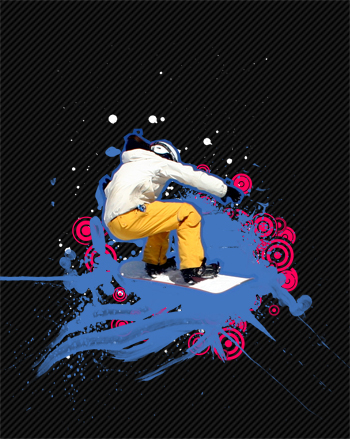
Select the eyedropper tool and click on part of the blue border round our snowboarder to get a good blue color that will blend in. Now grab your splatter brushes again and in a new layer create some big splatters behind our snowboarder until you have something that resembles the image below. You’ll notice that we’ve just been building this design up layer by layer which has given us a good effect and is the best way to work in Photoshop.
Step 8
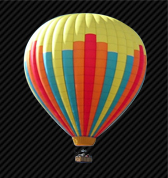
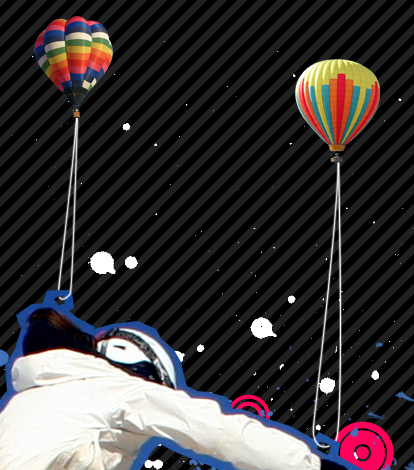
I thought that hot air balloons would like good in this piece because they’re colorful and they fly unlike something like flowers that are also colorful but look weird when floating in mid air. I used this image and this image but you’ll notice that both of them have background which need removed. Since these are going to be scaled down a lot then it doesn’t matter if they aren’t neatly cut out so paste one of the images in then use whichever method you feel comfortable with so either layer masks like we did with the snowboarder or use the eraser tool. Do this to both of the images
Step 9
Next scale them both down and this time put the layers above the snowboarder then position them like so.
Step 10
We want to give the appearance that the balloons are holding up the snowboarder so create a new layer below the balloons then select the pen tool and in the main toolbar make sure the paths button is pushed then draw a path by first clicking on one of the baskets then on one of the holes but this time hold and dray to get a slight curve then click again on the basket. Now select the brush tool and choose a 2px hard round brush with white as the foreground color then just hit return and that should stroke the path. Hopefully you have something similar to one of the balloons here and if you do then do the same with the other balloon.

Step 11
Use the eraser tool on this layer to make it look like the ropes go through the holes, check the image below to see what I mean.
Step 12
I added some more white splatters in a new layer directly above the snowboarder layer; one behind each balloon and one at the end of the snowboard.
Step 13
Lastly I just added some simple text in the top left corner using the same blue color. Feel free to add some more details and use your creativity.


