
In this great tutorial we will be learning how to create a spirograph effect in Photoshop, yep that thing that you played with when your a kid that made you feel artistic. Then we’ll be using the effect to create a very stylish poster design with some smart typography and wait for it… rainbow gradients! So give it a try and I’m sure you’ll learn a bit.
Introduction
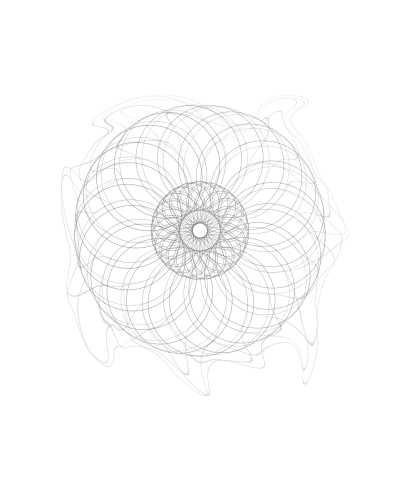
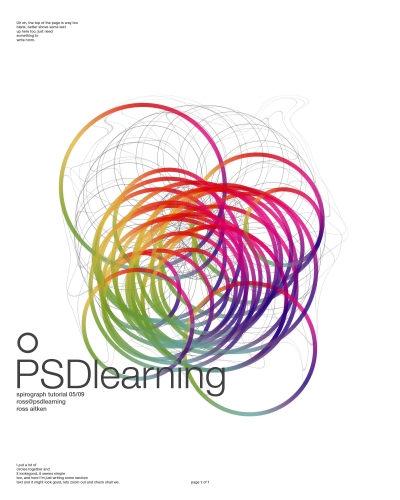
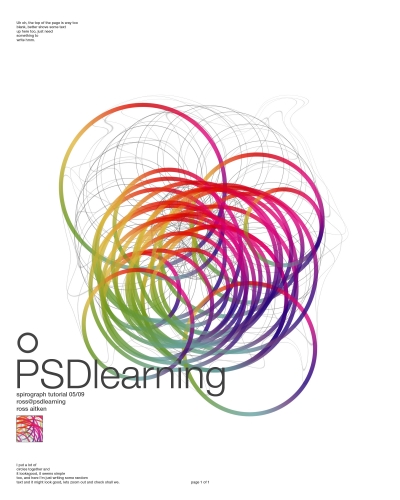
I got the inspiration for this tutorial from Diego Bellorin, a talented designer. You can check out his images here. Look below to see what we are going to make now.

Step 1
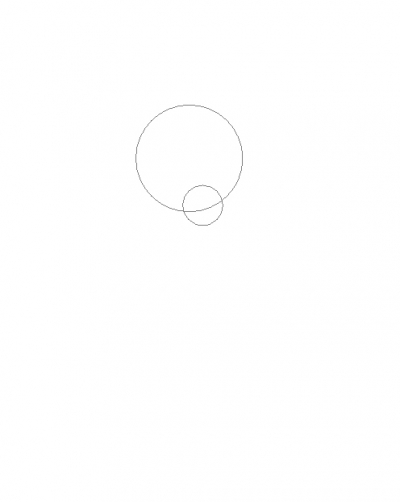
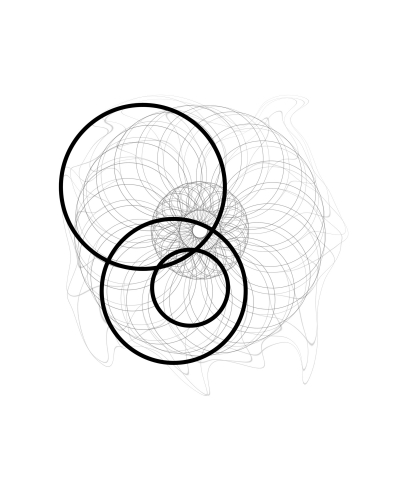
Create a new document with dimensions; 2000x2500px then create a new layer and make sure the foreground color is set to black. First select the brush tool and change it to a 2px hard brush. Next select the ellipse tool and in the main toolbar there are three buttons on the left, press the one in the middle which will say paths if you hover over it. Now what you have to do is to draw a few circles or ellipses next to each other, this is the basis for our spirograph pattern. Below you can see what my paths looked like.
Step 2
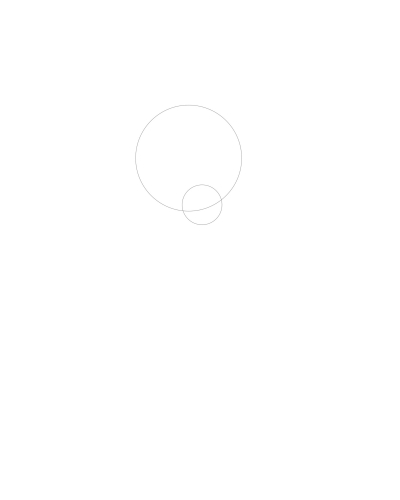
Now select the brush tool then just hit Return and this will stroke the path with the brush you selected earlier. Now change the opacity of this layer to 50%.
Step 3
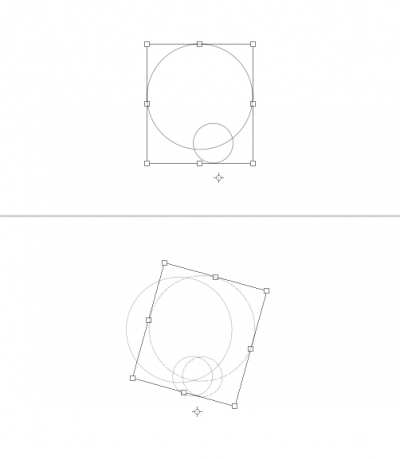
Now the complicated bit, we are going to make an action to turn this into a spirograph pattern, specifically the action is going to duplicate the layer then move the pivot point then rotate the layer slightly. So first open the actions panel by going Window>Actions or hitting Alt+F9. Now create a new action, thats the button in the actions panel that is the same as the new layer button in the layers panel. After you’ve hit ok the action will start recording automatically so you have to do exactly what I say now. Right click and duplicate the layer with the circles in it then hit Ctrl+T to enter free transform mode then first move the pivot point, thats the point in the middle of the bounding box, I’ve shown an image below of what it should look like after you have moved the pivot point. Now rotate the layer slightly until it looks like the second image below then hit Return. Now click the stop button in the actions panel.
Step 4
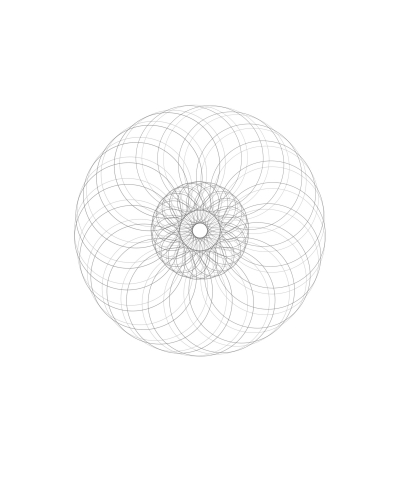
With the newer circle layer selected, all you have to do is to keep clicking the play button in the actions panel until you have something that resembles the image below. Next select all the layers that make up this pattern, so every layer except the background layer then hit Ctrl+E to merge them into one layer. You probably want this in the middle like mine so select this merged layer and select the background layer then select the move tool and in the main toolbar there are some alignment buttons, click the align horizontal centers one. You can also move it up and down at this point.

Step 5
Duplicate this layer then hit Ctrl+T again and this time just rotate the layer slightly then change the opacity of this layer to 50% and you should have something like below.
Step 6
We’re going to make it even more interesting now by distorting it a bit, duplicate this newer layer then go Filter>Liquify and witha suitably sized brush, brush away at the outer edge of the pattern, there isn’t any more I can here, just make it look like the image shown below.
Step 7
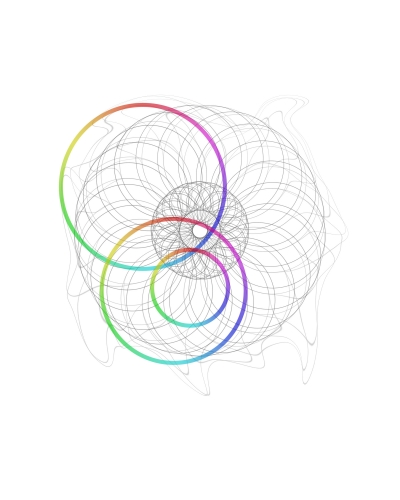
okay now create a new layer then change the brush diameter to 20px then using exactly the same technique as we did in step one, create a circle and stroke it. You’ll want to create about three of these in different sizes in different layers so that you have something similar to below.
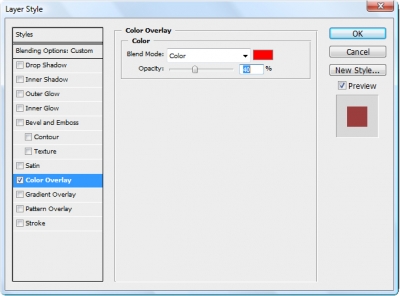
Step 8
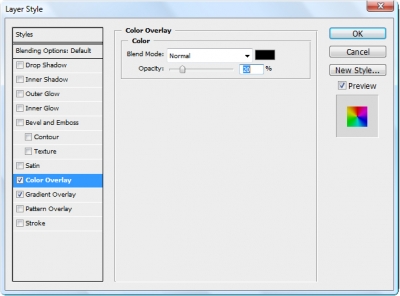
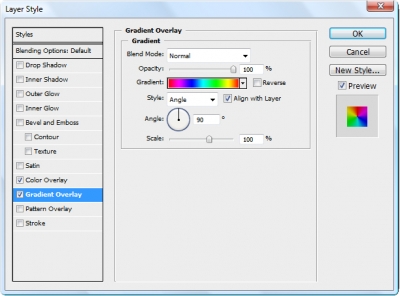
In the layers panel change the opacity of these three layers to 60% and the fill to 0%, this will make the circles disappear so right click on one of the layers and go to blending options and add the a color overlay and a gradient overlay using the settings shown below. After that right click on this layer and select copy layer style then right click on the other circle layers and paste this layer style, you should now have something similar to the bottom image.
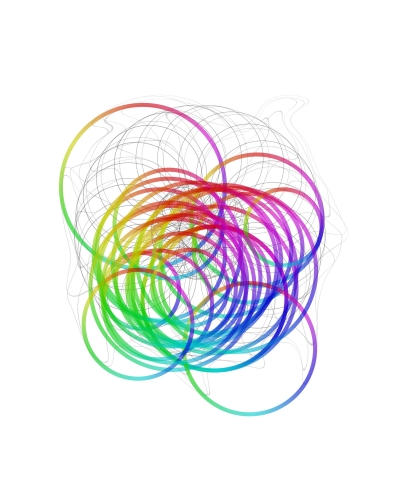
Step 9
Okay, now this step will take a bit of time what you have to do is select these three layers then duplicate them so you now have six layers with rainbow circles now select the move tool and move these new layers around. Now do this maybe seven more times, it’s up to you so whatever you think looks good. I’ve shown what mine looks like below.
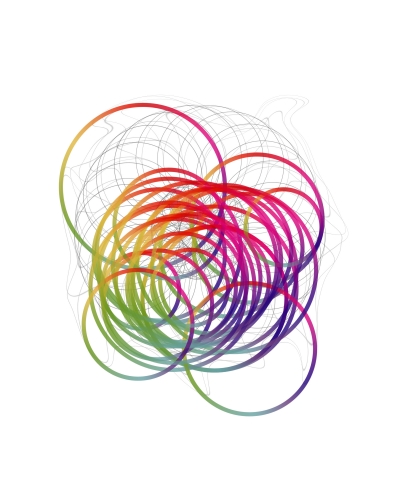
Step 10
Now select all these rainbow circle layers then hit Ctrl+E to merge them (if you have experience with smart objects then convert it to a smart object instead of merging, thats what I did). Now go into the blending options for this layer and add a color overlay using the settings below.

Step 11
I felt the these circles were a bit too light so duplicate the layer then lower the opacity of the duplicated layer to 80%.
Step 12
Now its time to add some text to make it look more like a poster, it doesn’t matter what you type the text will make the image look better. I recomend Helvetica font for this kind of thing, if you don’t own helvetica then use a similar sans-serif font. Use a gray color, I used #404040. You can mess around with the placement of the text until it looks good, I also added another circle, you should be an expert at creating these now though.
Step 13
Now as a wee finishing touch create a new layer then go Image>Apply Image, now with the rectanglur marquee tool drag a selection holding Shift to make a square (make the selection over a colorful bit). Now go Select>Inverse then hit Delete. You should be left with a square of the picture, you can scalee this down by going into free transform mode (Ctrl+T). I also added a thin grey stroke within the layer styles to give it a border but this is optional. Take a look at the finished image below.
Conclusion
Thats us done, pretty nice result eh? If you’re interested in actions in Photoshop then I wrote another tutorial using them in a similar way, check it out here. Hope you enjoyed this and learned something new, make sure to add your own images to the PSDlearning Flickr group for a chance to be a featured artist.
Related Articles
 Generic Retail Logos Your Clothing Store Should Ignore
 7 Characteristics of a Good Website for Small Business Owners
 The Three Best Marijuana Dispensary Logo Designs (And the Three Absolute Worst)
 How Do You Read or Interpret an Equivalent Ratio?
 How to Create a Promotional Design for a Record Keeping Company
 Improving SEO: How Effective Are Backlinks?